How to Keep Your Sourdough Starter Jar Clean
Share
Maintaining a clean sourdough starter jar is just as important as keeping your starter healthy and active. A clean jar prevents any unwanted bacteria or mold growth, and it also ensures your starter thrives and stays at its best. If you’re like me, you’ve probably faced the challenge of keeping your starter jar pristine while managing regular feedings. In this post, I’ll walk you through my method for maintaining a clean sourdough starter jar, keeping things simple and effective!
Why Cleanliness Matters for Your Sourdough Starter
Sourdough is a delicate ecosystem of wild yeast and beneficial bacteria. While they’re resilient, they can be sensitive to contamination from harmful bacteria or mold. Keeping your starter jar clean not only helps avoid any issues but also keeps your starter vibrant, healthy, and free from unwanted smells. This can make all the difference in producing consistently good bread.
My Method for a Clean Starter Jar
Here’s my easy-to-follow system for keeping your sourdough starter jar clean and sanitary without a lot of extra hassle. I like to keep things as simple as possible by using two jars, metal lids, and a smart trash disposal system.
1: Rotate Between Jars for Easy Cleaning
I wanted to keep my sourdough journey and stress-free as possible, so I got two of these sourdough starter jar kits so I wouldn't have to move my starter to any temporary homes while for those necessary jar cleanings. I simply switch to whichever jar is clean after each feeding. This keeps things simple and ensures that I always have a clean jar ready for use.
Here’s how it works:
- After you feed your starter, simply transfer it to the clean jar that’s available. The jar you’ve been using (the "dirty" jar) will now be empty and ready for cleaning.
- Once your starter is safely in the clean jar, clean and sanitize the "dirty" jar so it’s ready for the next time you need to switch again. This process allows you to maintain a clean jar without needing to worry about extra jars cluttering up your kitchen.
Tip: By switching jars regularly, you ensure that neither jar gets neglected, and you're always working with a jar that’s ready for your next batch of starter. This method also eliminates the hassle of trying to clean a jar that’s full of starter.
This method is super efficient and keeps your jars fresh, clean, and ready to go without requiring extra storage space or complicated rotations.
2: Wash & Sanitize Your Jars
While using two jars allows for a clean jar swap, it’s also important to sanitize the jars after cleaning to keep your sourdough starter safe and healthy. Here’s how I do it:
- Wash the Jar: Wash the jar with hot, soapy water.
- Sanitize: Once the jar is clean, I use a non-toxic sanitizing method. I prefer using the sanitize setting on my dishwasher (basically just scalding hot water). You could also boil the jar or use steam in the microwave, whatever works for you! I would not use vinegar or bleach or anything of the sort to sanitize your jar, because I wouldn't want anything to mess with the health of my starter.
- Dry Your Jar: Whether your dishwasher dries it or you allow it to air dry, I'd ensure that your jar dries before storing it where it'll wait for the next rotation. A clean, dry jar is essential to prevent mold or bacteria growth.
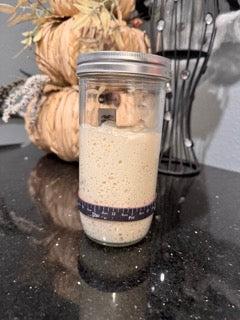
3: Use a Metal Lid to Prevent Contamination
I always use a metal lid to cover my sourdough starter jar. While many people opt for a cloth cover, I prefer metal for a few reasons:
- Avoiding Bacteria Harboring: Cloth lids can trap moisture and bits of starter, creating a perfect breeding ground for mold or bacteria. This isn’t an issue with a metal lid, which is easier to clean and less likely to trap moisture.
Simply place the metal lid on your jar after each feeding, and make sure it fits snugly, but not too tight. This way, the yeast and bacteria can do their work without the risk of contamination.
4: Protecting Your Sink (Use a Plastic Grocery Bag)
This tip is more for the health of your sink, and not your jar, but it's important so it must be included!
Every time I feed my starter, I reuse a plastic grocery store bag. I place it on the counter, next to my jar, and throw my discard in there (if I'm not using the discard for anything else). I'll also use the inside of the grocery bag to scrape any starter off my utensils before throwing them into the sink. Sourdough starter turns into cement in your pipes which can wreak havoc on your plumbing and cost an arm and a leg.
Here’s my process:
- Wipe Off the Utensils: After each use, I wipe off any remaining starter from my spoon, spatula, or measuring cup directly into the plastic grocery bag.
- Throw the Bag Away: Once the bag has all the discarded starter, I simply tie it up and throw it away. This helps me keep my sink and drains free from any starter residue, which could potentially clog up the pipes over time.
- Washing: I then wash my utensils with hot water and dish soap, sanitize them, and they're ready for the next feeding.
By using this method, I avoid the mess of scraping off dough residue and keep my kitchen tidy and sanitary.
5: Regularly Check for Signs of Contamination
Even with the best cleaning methods, it’s important to regularly check your starter jar for signs of contamination. Look for:
- Funky smells that might indicate spoilage. Some smells are normal and can be troubleshooted. This chart should help you assess any weird smells!
- Mold growth around the jar rim or on the starter itself. Any unusual textures or fuzziness of any color. Your jar would have to be thrown away.
- Discoloration can also be a sign of trouble in flora paradise. Clear to dark liquid is hooch and completely normal for a hungry starter thats been in the fridge too long. Mold (of any color) means you need to toss your starter. And streaks of pink/red/orange are indicative of Serratia marcescens, a type of harmful bacteria. This would also mean that you need to toss your starter.
I would toss my entire jar if I lost my starter to mold or Serratia marcescens. I know glass is nonporous so it could probably be thoroughly cleaned, but the anxiety that would keep me up at night wondering if I cleaned it well enough or if any mold spores are now floating in the air would be enough to make me want to move out of my house. If you lose your starter, I'm truly sorry for your loss.
You can always start a new starter from scratch, get starter from a friend, or order some starter from us to continue your journey! When you fall down, all that matters is that you get back up.
Conclusion
Keeping a clean sourdough starter jar is an essential part of maintaining a healthy, thriving starter. By using the simple method of rotating between two jars, opting for a metal lid, and practicing cleanliness with your utensils and jar sanitization, you’ll create the perfect environment for your sourdough culture. With these easy steps, you can ensure that your starter is always fresh, healthy, and ready to bake the most delicious bread!
By following these tips, you’ll keep your sourdough starter jar spotless and your starter flourishing. Happy baking, and may your loaves rise with ease!